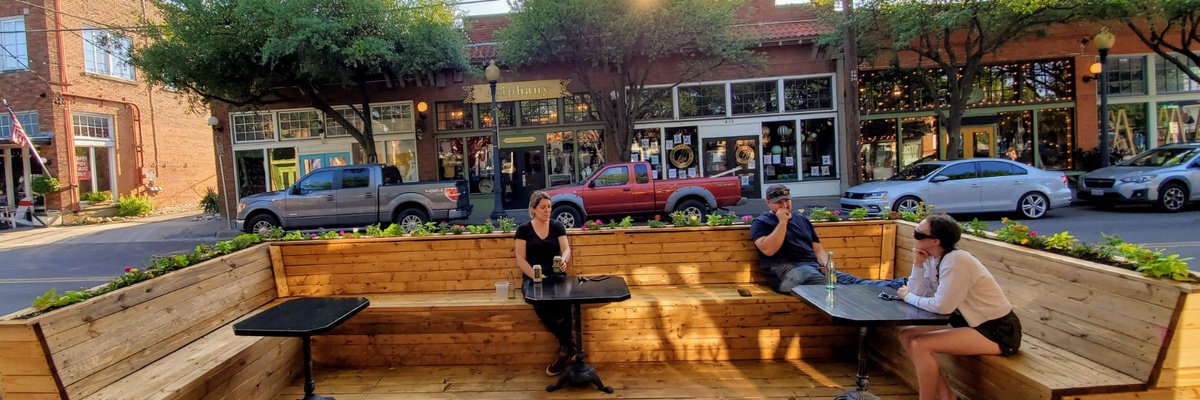
"Hello! We're so excited you're thinking about creating a parklet in your city. We love parklets, because not only do they challenge us to rethink a space normally reserved to store cars, but they also allow for more space for pedestrians. We've also seen how impactful they can be for small businesses, expanding their footprints past their doors. We look forward to designing with you!" - Krista Nightengale, Executive Director of the Better Block

Initial planning should take up to 3–6 hours, getting permit may take anywhere from a couple hours to a couple days to fill out, the fabrication of the parklet may take a couple days and installation should take only a couple hours.
Identify a Location
For your parklet, you need to identify where it is going to go. Most parklets are 20-feet-by-6 (or 8)-feet. They can be for either public or private use. If you are looking to do a parklet for public use, consider what people will need it for, and which design would be best. If you’re working on a parklet for private use, work with the business owner to determine what type of approach makes the most sense.
Figure out Permitting Requirements
Whether creating a parklet for public or private use, you will need to work with city staff to determine a few things:
1. What size parklet can you build
2. What type of permitting do you need
3. What permissions from surrounding properties do you need
4.. What kind of insurance or liability coverage do you need for the parklet? A lot of cities already have parklet programs in place, but if yours does not, you’ll need to work alongside City staff to figure out the permissions.
Choose A Parklet Design
Based on the location, type of parklet, and permitting, you’ll decide from one of these four designs from our library Wikiblock. You will also have a Zoom call with Krista at Better Block as part of the 30 Day Challenge. Krista can offer guidance on which design is a good fit for your idea.
Board Games
If you want a parklet that’s there for people to enjoy and get to know one another, we recommend the board game approach. It’s a way to create a passive space that allows for interaction.
Trampoline
This one may require a bit more work with the city to get approval, but it is a very fun way to rethink a parking spot’s use. Business: This one is more for the private approach and allows for a business to expand its footprint into the public realm. You can use these shelves to display goods. Restaurant: This could be for public or private. It’s a simple way to add some seating and tables and enjoy being outside.
Business
This one is more for the private approach and allows for a business to expand its footprint into the public realm. You can use these shelves to display goods.
Restaurant
This could be for public or private use. It’s a simple way to add some seating and tables and enjoy being outside.
Fabricate
Once you have the site, permissions, and design chosen, you will need to begin fabricating. The designs we’ve included have all the cut pieces you’ll need to share with a fabricator. You’ll need to find someone who has a 4x8 CNC router. We generally find fabricators at colleges, makerspaces, and those who design cabinets. The designs will be from our library Wikiblock.
Install/Maintain
Now’s the fun part: building
All these designs are created to be built without any glue, screws, or designs. So you’ll just need to gather a few volunteers, and get to work.
Feel free to customize however you’d like—with paint, flowers, and whatever else you come up with! Don’t forget the maintenance part. You want these parklets to look loved and taken care of so that people passing by will also love them.
Have a plan for regular maintenance
Keep in mind that these elements are made with plywood, so they won’t last forever. Paint or treat them to get a little more usage out of them.