
From launching your garden committee to hosting a school-wide ‘dig day’, learn how to start a school garden for education, eating, and fun.
"Getting your garden from idea to harvest is a journey with many steps. Luckily many others have travelled this road before. The following list includes five key steps recommended by teachers and parents with experience operating successful gardens." - Greg Seaman (founder of Eartheasy)

As much or as little time as you have! Your garden will absorb as much time as you give it. We recommend 4-8 hours of initial planning and design time, half a day of sourcing and securing materials, one full dig day, and a few hours a week of maintenance.
While it might only take a single motivated educator to start a school garden, forming a committee early in the process will give your garden longevity and help prevent burnout for any one member. A garden committee makes decisions about how a school’s garden will look, what it will be used for, and how it will operate. The committee may start as primarily a planning body that later morphs into an operational committee, or it may simply offer direction for a garden coordinator. Whatever model you choose, the committee should ideally consist of 5-10 members representing the following areas:
If your school garden will support your school cafeteria or another nearby food program, it’s a good idea to include a representative from your school’s food service department as well. The more diversity you can achieve, the better representation you will have and the better the end results.
Aim to find committee members with a passion for the project, along with a broad range of skills. Duties might include:
Developmental stage
Operational stage
You can structure your garden committee like a regular board with a chairperson to organize meetings and communicate details, or opt for something more informal. Either way, be sure your school’s administration is involved and informed. Getting parents involved from the beginning also helps families take more ownership down the road.
Once you have your committee in place, determining goals for your garden is an important next step. Schools build gardens for different reasons. Here are some common goals and objectives.
To provide outdoor, hands-on learning
The classic teaching garden helps teachers provide their students with real-life learning. The hands-on environment compliments lessons about plant and insect life cycles, along with experiential activities like building a bug hotel. Art, math, English, and social studies: all these lessons can find a home in the teaching garden.
To cultivate food for school programs
Some schools use school gardens to augment their school lunch or food services programs. Fresh greens, tomatoes, cucumbers, and more can all end up in the kitchen or in the school cafeteria salad bar.
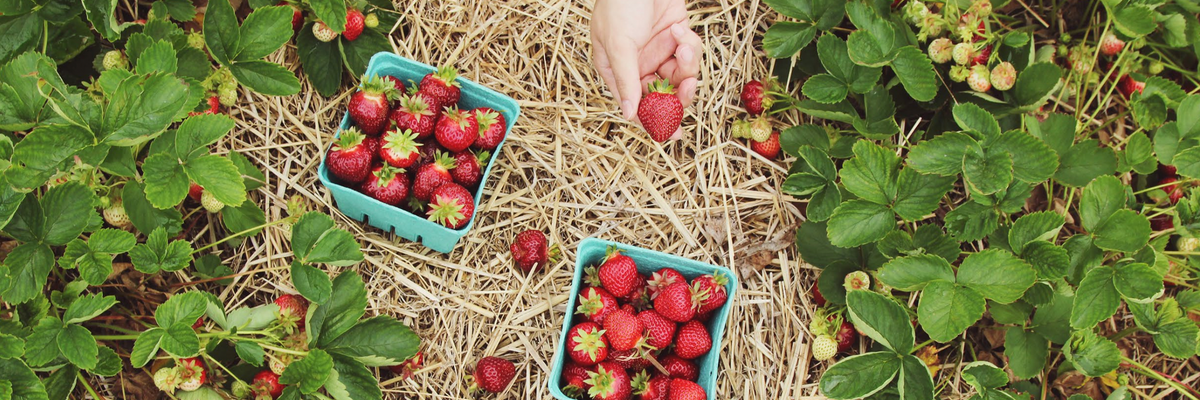
To send fresh fruits and vegetables home with students.
In some locations, children don’t have access to fresh produce or lack the resources at home to afford them. Schools gardens can provide the chance to experience vine-ripened goodness while meeting the goals of the curriculum.
To reduce school-generated food waste.
Adding a composting system to a school garden helps teach children about the decomposition process and eliminating food waste. Many schools even encourage teachers and students to bring compostables from home to really get the process going.
To provide a therapeutic space for children and young adults.
Gardens are peaceful, healing spaces where many can find rest and respite from the world around them. Many therapeutic programs feature gardens for their healing abilities.
Identifying the primary and secondary goals for your garden will help you determine what size and style of garden you need. Once you have a sense of your garden’s direction, consider the following questions to further hone your vision:
1. Who will use the garden?
Which grade levels will spend time in the garden? How will they use the space? Some schools assign one bed for each class to tend, while others share the beds over multiple classrooms.
2. How often will students use the garden?
Biological processes are always taking place in the garden—not just during planting and harvest time. Aim to have children visit the garden weekly during your gardening season and less frequently when things are dormant. Even when things appear to be sleeping, there are still lessons to learn. Regular visits will help children develop a connection with the space.
3. Who will be responsible for scheduling?
Someone on your garden’s committee, usually a teacher, will need to oversee the timing of classroom visits. Too many children in the garden at once can take pleasure out of the experience.
4. Who else is needed to accomplish your goals?
If your plan is to provide the school cafeteria with fresh vegetables for part of the year, you’ll need to plan your activities around local seed and harvest times. Consult local experts through your neighbourhood nursery or extension office to get information right for your climate and soil conditions.
Now that you know the main purposes for your garden, review available sites and determine which one is right for your needs. Along the way, consider the following questions.
How much space do you need to meet your goals?
How many beds do you plan to install to produce food for your school’s needs? What is the best way to divide that space into beds? What other items (compost bin, tool shed, potting tables or benches, trellises, etc.) do you need? The answers to these questions will help you design the configuration of your beds and how much space you need to contain them.
Is there enough sun?
Direct exposure to sunlight is one of the most important needs your garden will have. While salad greens need about 4 hours of sunlight each day, your site will ideally have 7-8 hours of sunlight to accommodate the broadest range of fruits and vegetables. If you’re unsure how much light your site gets, use a sunlight calculator to be sure.
Where is your water access?
Your site should ideally be no more than one hose length away from the nearest faucet or standpipe. If you plan to install in-ground irrigation, the distance away from your water source will affect the pressure needed to get water to your site.
What type of beds will you use?
While a traditional in-ground garden is the simplest to install, it requires that good quality soil be available onsite. You can order additional soil or well-seasoned compost to augment what’s there, but there should be something to start with. Benefits of in-ground gardens include flexibility, good moisture retention, and the ability to add cold frames or hoop houses as needed to extend the growing season.
Raised beds are commonly used in school gardens because they make weed control easy and are accessible for all ages and abilities. They also come in a variety of heights, widths, and lengths. In most cases, use beds 3 or 4 feet wide so that children can reach the center of the bed without standing on the soil.
Raised garden boxes generally have no bottoms and sit directly on the soil. This is the ideal set-up. However, if you must install your beds on concrete, consider purchasing beds with integrated bases and increasing the height of your garden to at least 18 inches. Taller beds will give you more versatility in terms of what plants you can grow. Any garden beds which have bottoms fitted to them must be designed to ensure good drainage.
Many schools also use horse troughs, either alone or in conjunction with other raised beds.
Can you go vertical?
Schools wanting to get the most out of their space often add vertical elements. This includes trellises on raised garden beds, wall pockets of varying sizes hanging on fences or walls, and stacked garden towers in a central, accessible location. Just be sure to place vertical elements so they don’t shade any beds behind them (e.g. place them south of shorter beds if you’re located in the northern hemisphere).
What type of soil is on site?
Starting with healthy, living soil gives your garden the nutrients it needs to thrive. And while you can add fertilizer before planting, healthy soil is more than just nutrients. The best soil structure is fluffy, lightly textured, and full of organic matter that’s continually breaking down. It provides enough air pockets for roots to infiltrate and water to travel. If there is dirt available on site, conduct a soil test to find out what nutrients you can add. Performing a simple squeeze test will help you further evaluate your soil’s tilth and organic matter content.
If, like most soils, yours needs help, the best sources of organic nutrients are finished compost and well-rotted manure (at least two years old). Both of these can augment whatever soil is available on site for a winning combination of nutrients plus organic matter.
Is the site secure?
In most locations, gardens must be fenced to keep out animal pests and little feet looking for short cuts at recess. Factor your need for a fence into your initial site considerations. Is there a location close to an existing fence that could help reduce your expenses for full perimeter fencing?
Even if you don’t have much foot traffic or pests in the vicinity, consider securing your garden with a fence to deter human mischief. Locating your garden in a well-lit area with neighbors nearby is another way to discourage nighttime visitors.
1. Planning
Working with a garden or landscape designer is often beyond the reach of schools sticking to a bare bones budget, yet it can also be a way to save costs in the long term.
To begin, talk with other schools in your district that already have successful gardens and ask who helped them with their design. If your garden will be small—just a few beds— the main question you’ll need to answer is where to locate those beds and how to place them (see above). For larger gardens, there are other important considerations.
We'e developed a helpful 'Gardening Checklist' to help consider the critical elements as you begin the design process. Download this checklist from the 'Resources' section and consider: which ones would complement your garden? Which ones would support your teaching goals? Bring the checklisto your first garden design meeting.
2. Designing
Sample Designs
Once you have an idea of the elements you want in your garden, you can start to cost out what’s possible for your space. In the 'Resources' section you can view and download three garden designs showing sample crops that can be harvested during the school year in the Southern United States. To adjust for your area, talk to your local extension agent.
Consider Materials
With your new design in hand, consider what materials students and educators will need to make the most of your garden. This includes thinking about both the building and operational phases.
Recycled Plastic or Wood?
If your garden will contain raised garden beds, what will those be made from? Although treated wood lasts longer where wood is concerned, it is usually coated in chemicals that can leach into the soil and get taken up by plants. Recycled plastic beds are made of solid HDPE plastic which is safe for gardening, will not rot or degrade, and is very durable. These beds are heavy and expensive. However, they are worth the cost since they are so long lasting. Cedar beds are beautiful and rot resistant when compared to other woods, and some even come with a natural, silica-based treatment that is safe and non-toxic. For those that don’t, the application of Eco-wood treatment (also safe and non-toxic treatment) will improve longevity when applied to the inside of the beds. Other less expensive species of wood can be used, of course, which might not last as long as cedar. Ask your local lumberyard about options they recommend.
Read More: Cedar vs. Recycled Plastic vs. Composite Raised Garden Beds
Soil
As noted above, soil is best amended by compost and organic, well-aged manure. But what if there’s no soil on hand to fill your beds? Purchasing good garden soil requires research. Often “topsoil” may appear healthy, but on closer inspection it consists of low quality dirt and sand. Talk to local suppliers about their sources, specifying that you want to grow vegetables. Many municipalities now offer compost for sale from local landfills or industrial composting facilities. Avoid anything that isn’t processed under high heat, because it may contain weed seeds.
Read More: Raised Beds: Preparing Your Garden Beds for Spring
Read More: 3 Useful Soil Mixes for Planters and Raised Beds
Fertilizers
Chemical fertilizers may give plants a quick fix, but they have been shown to deplete soil over the long term. Instead, feed your plants and your soil at the same time with an all-purpose organic fertilizer. You will need half a pound for each 10 square feet of soil. Perennial plants and shrubs will have other, more specialized requirements. You can also grow a cover crop chosen for your climactic area to add nutrients to the soil. Talk to your local nursery or seed supplier for more information.
Read More: Up, Down, All Around: A Simple Way to Understand Fertilizers
Irrigation
As noted above, different irrigation systems are available to suit different garden designs. While drip irrigation is ideal for some set-ups, it can also be expensive and require some ongoing maintenance. Using soaker hoses or hand watering are viable options, depending on the size and configuration of your beds. You can also set up rainwater catchment systems using rain barrels to store water during the rainy season.
Read More: Drip Irrigation vs. Soaker Hoses: Which is Better for Your Garden?
Read More: Tips for Installing a Rainwater Collection System
Tools
Since most gardens are designed for one class to visit at a time, the number of tools will usually reflect the average class size at your school. The following list of materials was adapted from the Healthy Planet Foundation’s basic supply list for a schoolyard garden.
Fencing
As noted above, school gardens benefit from a secure fence. Wire mesh fencing with wooden or metal posts is usually more cost effective than wooden slat or picket fencing. Choose your preferred material, and then calculate the length needed by measuring around the perimeter. Be sure to add clearance for paths around all sides of each bed. Paths greater than three feet will accommodate a wheelbarrow (allowing you to turn and dump its contents).
Plant!
Now that you've done all the ground work to ready yourself for a successful garden, there's nothing left to do except to implement and install. Follow your set plan, and consider making a fun event out of this. Read our case studies in the 'Resources' section to see how other schools have hosted 'Dig Days' to get anyone and everyone involved in the launch of your garden!